Zenny – AI-Powered CFO for Shopify Merchants

- Navigate to the Settings button on the top bar.

- Click the “Add integration” button -> Add your bank account.

- Select your bank from the alternatives and you will be directed to log in to your bank.
- Log in with your bank credentials and you will be redirected back to Zenny.
- Bank integration connected successfully! 🎉


1. Log in to your Shopify store and go to Settings -> Apps and sales channels.
2. Click the “Develop apps” button.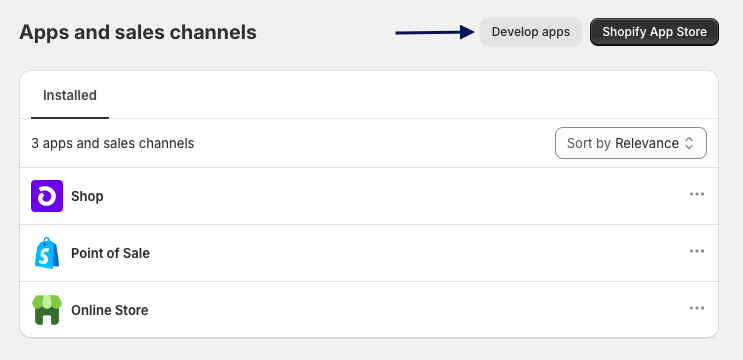
3. Click “Create an app”, and give it a name – for example Zenny.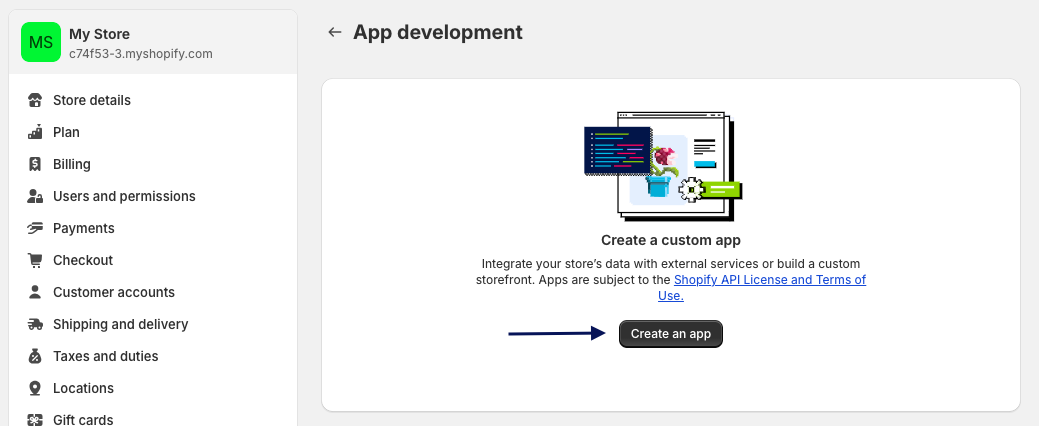
4. Click “Configure Admin API scopes”.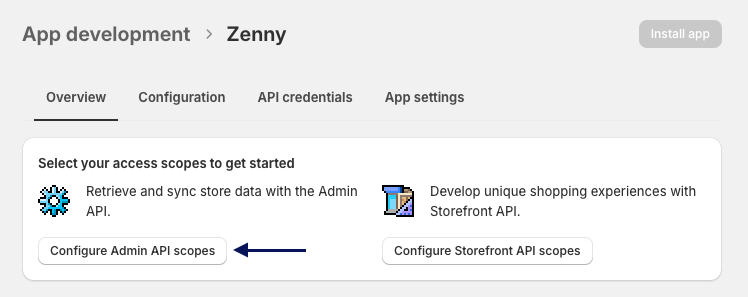
5. Scroll through the scopes, select ALL of the following and click “Save” button:
Read_inventory
Read_orders
Read_payment_terms
Read_products
Read_reports
read_shopify_payments_accounts
read_shopify_payments_bank_accounts
read_shopify_payments_disputes
read_shopify_payments_payouts
6. In a new browser tab, go to https://hub.zenny.ai and sign in.
7. Navigate to the Settings button on the top bar -> Click on the “Add integration” button -> Add a Shopify custom app.
8. Back in your Shopify app development page, click the tab “API credentials” and scroll down to the API key and secret key section.
9. Copy and paste all three fields into the Zenny settings page (API Key, API secret key and Admin API access token). Please note that if you don’t see the “Admin API access token”, you need to install this custom app first from the top right corner (check the picture from step 4).
10. Click “Save details” when all fields are filled.
11. Shopify integration connected successfully! 🎉
- Navigate to the Settings button on the top bar.
- Click the “Add integration” button.
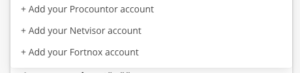
- Select your accounting platform from the alternatives.
- Click the “Connect” button and you will be directed to log in to your accounting platform.
- Log in with your accounting platform credentials and you will be redirected back to Zenny.
- Accounting platform integration connected successfully! 🎉
- Log in to your Netvisor account and navigate to the company menu.
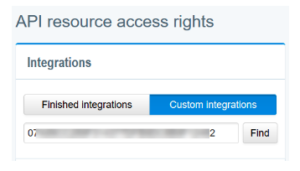
- Click “API resource access rights” -> Integrations -> Custom integrations.
- Search for 2E230F99ACB62AFF7F72AB35F8B683A8 and select us.
- Give access to the integration by clicking on the tab “integration blocked” next to Integration access rights -> The tab switches to enabled and turns blue.
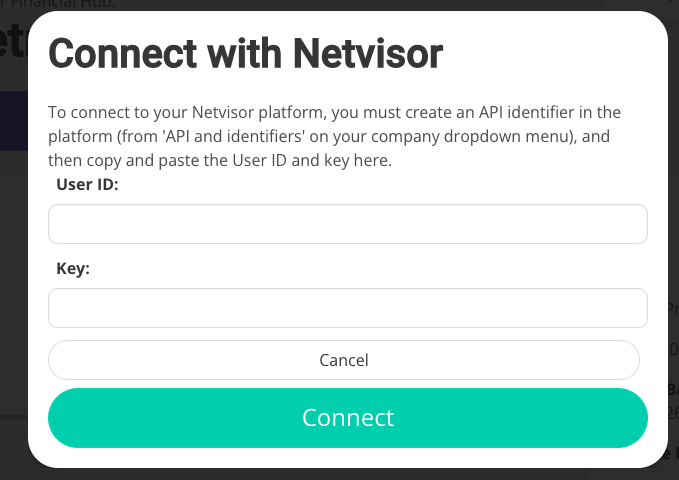
- Go back to the Netvisor company menu and go to “API identifiers”.
- Click the “Create new API identifier” button, and copy your User ID & Key from below.

- Open a new browser tab, go to https://hub.zenny.ai and sign in.
- Navigate to the Settings button on the top bar -> Click the “Add integration” button -> Add your Netvisor account.
- Paste the User ID and the Key that you just copied from your Netvisor API identifier section and click the “Connect” button.

- Netvisor integration connected successfully! 🎉


- Navigate to the Expenses dropdown button on the top bar and click “Add new expense”.

- Select the type of expense and give it a name, for example “Monthly Rent”.
- Enter the date when this expense will be billed (For example, the due date of your rent).
- Enter an amount for this expense in EUR and click the “Save expense” button.
- Expense added successfully! 🎉
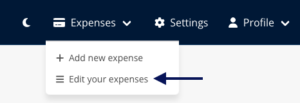
- Navigate to the Expenses dropdown button on the top bar and click “Edit your expenses”.
- Select the expense you wish to edit and click the “Edit” button.
- Edit the section(s) you wish to edit and save changes by clicking the “Save expense” button.
- Expense edited successfully! 🎉
